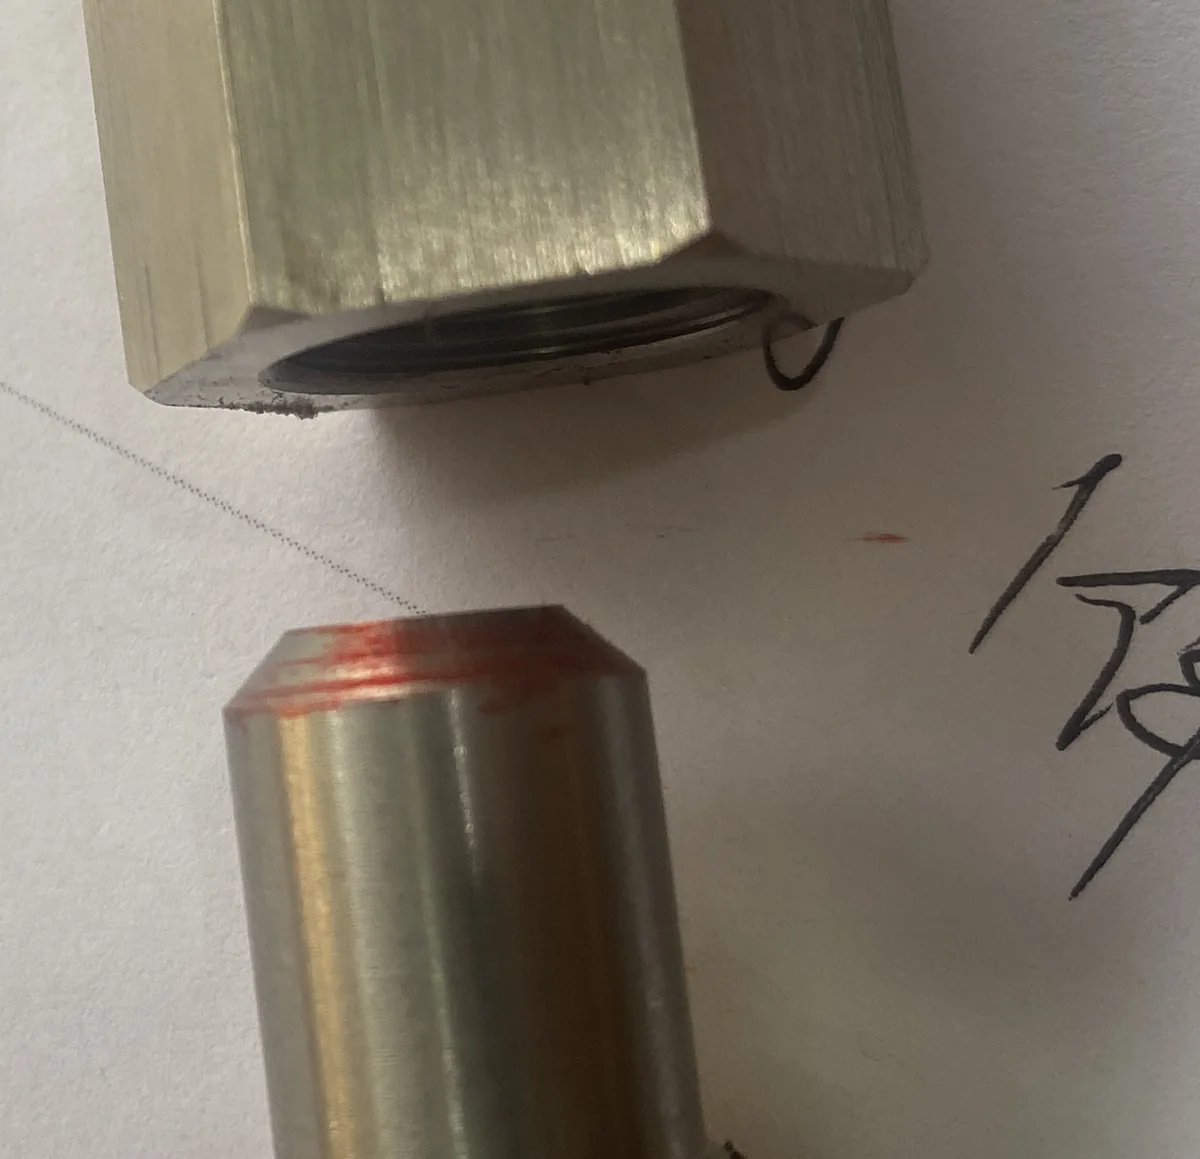
THE TWO HALVES APART · SEAL CAPTURED IN THE COUNTERBORE · RED MARKING COMPOUND SHOWING WHERE THEY TOUCHED
The Problem: a Joint No Standard Covers
This job was two machined halves that had to screw together and hold pressure. Both halves belonged to the customer's own assembly — neither was a catalogue fitting, and neither end was a standard port.
That distinction is the whole job. A catalogue fitting seals where its standard says it seals: an NPT nipple on the thread taper, a BSPP male under a bonded washer on a spotface, a JIC male on its 37° cone. Those documents already made the decision. Here there was no such document. Nothing said which surface was the sealing surface — and when nobody decides that, both halves come off the lathe dimensionally correct and the assembly still weeps in service.
What we worked from: a customer drawing, plus the requirement stated in one line — the two parts have to seal when they are joined. Dimensions and the drawing itself are withheld here under our NDA and confidentiality policy, which is also why the drawing under the parts is not readable in the photographs.
The Design Decision: Which Half Carries the Seal
We put the seal in the female half and the sealing surface on the male half. The reasoning, in order:
- The seal is captured, not clamped. It sits in a counterbore machined behind the internal thread, so it cannot fall out or be forgotten when the joint is opened for service.
- The male half carries a plain radial land — a smooth cylindrical band ahead of the thread. That land, not the thread, is the sealing surface.
- A lead-in chamfer ahead of the land lets the seal be entered rather than shaved. A square-edged land shaves a sliver off the elastomer on the first assembly, and that sliver is the leak path.
- The thread does nothing but pull the two halves together. Freeing it from any sealing duty is what makes the joint repeatable — it can be tightened to a sensible torque instead of "until it stops weeping".
| Feature | What it does | Why it was specified that way |
|---|---|---|
| Counterbore, female half | Captures the elastomer seal behind the thread | Seal can't be lost at service; depth sets the squeeze |
| Radial land, male half | The sealing surface the elastomer runs on | Diameter and tolerance set the squeeze together with the counterbore |
| Lead-in chamfer | Guides the seal onto the land | Prevents the seal being cut on assembly — the classic first-fit failure |
| Land surface finish | Ra 0.8 µm (32 µin) or better, turned | Direction matters as much as the number: marks that circle the land seal, a mark crossing it leaks |
| Thread, both halves | Clamp load only | Not a sealing element — so it is cut for engagement and strength, not for wedging |
| Hex, both halves | Wrench flats on each part | Both halves must be held; a single-hex design twists the seal on assembly |
Why 316 — and Why It Was Left Bare
316 stainless was specified for corrosion life. It also removed a variable that catches people out on sealed parts: plating.
Electroplated zinc is specified by minimum thickness class — Fe/Zn 5, 8, 12 or 25 µm under ASTM B633 and ISO 4042 — and the deposit is never even, which is exactly why those standards require the surfaces needing a minimum thickness to be identified on the drawing. Plate a finished sealing land and you have moved its diameter by up to 25 µm a side, and moved the seal squeeze with it. Bare 316 needs no coating, so the land that comes off the lathe is the land that goes into service.
The trade-off we do watch for with 316 is galling: stainless-on-stainless threads cold-weld under friction, because the very thin chromium oxide film breaks, the austenitic surface work-hardens, and the two faces adhere. A galled joint that has to be cut off destroys the sealing land with it. So the parts are hand-started, anti-seize is advised, and where the design allows we pair different grades or hardnesses across the joint.
Proving It Sealed — Before It Left
Contact is not something to argue about; you look at it. Marking compound goes on the sealing land, the two halves are assembled and separated, and the transfer is read. That is the red visible on the parts in every photograph on this page — it is not paint, and it is not decoration.
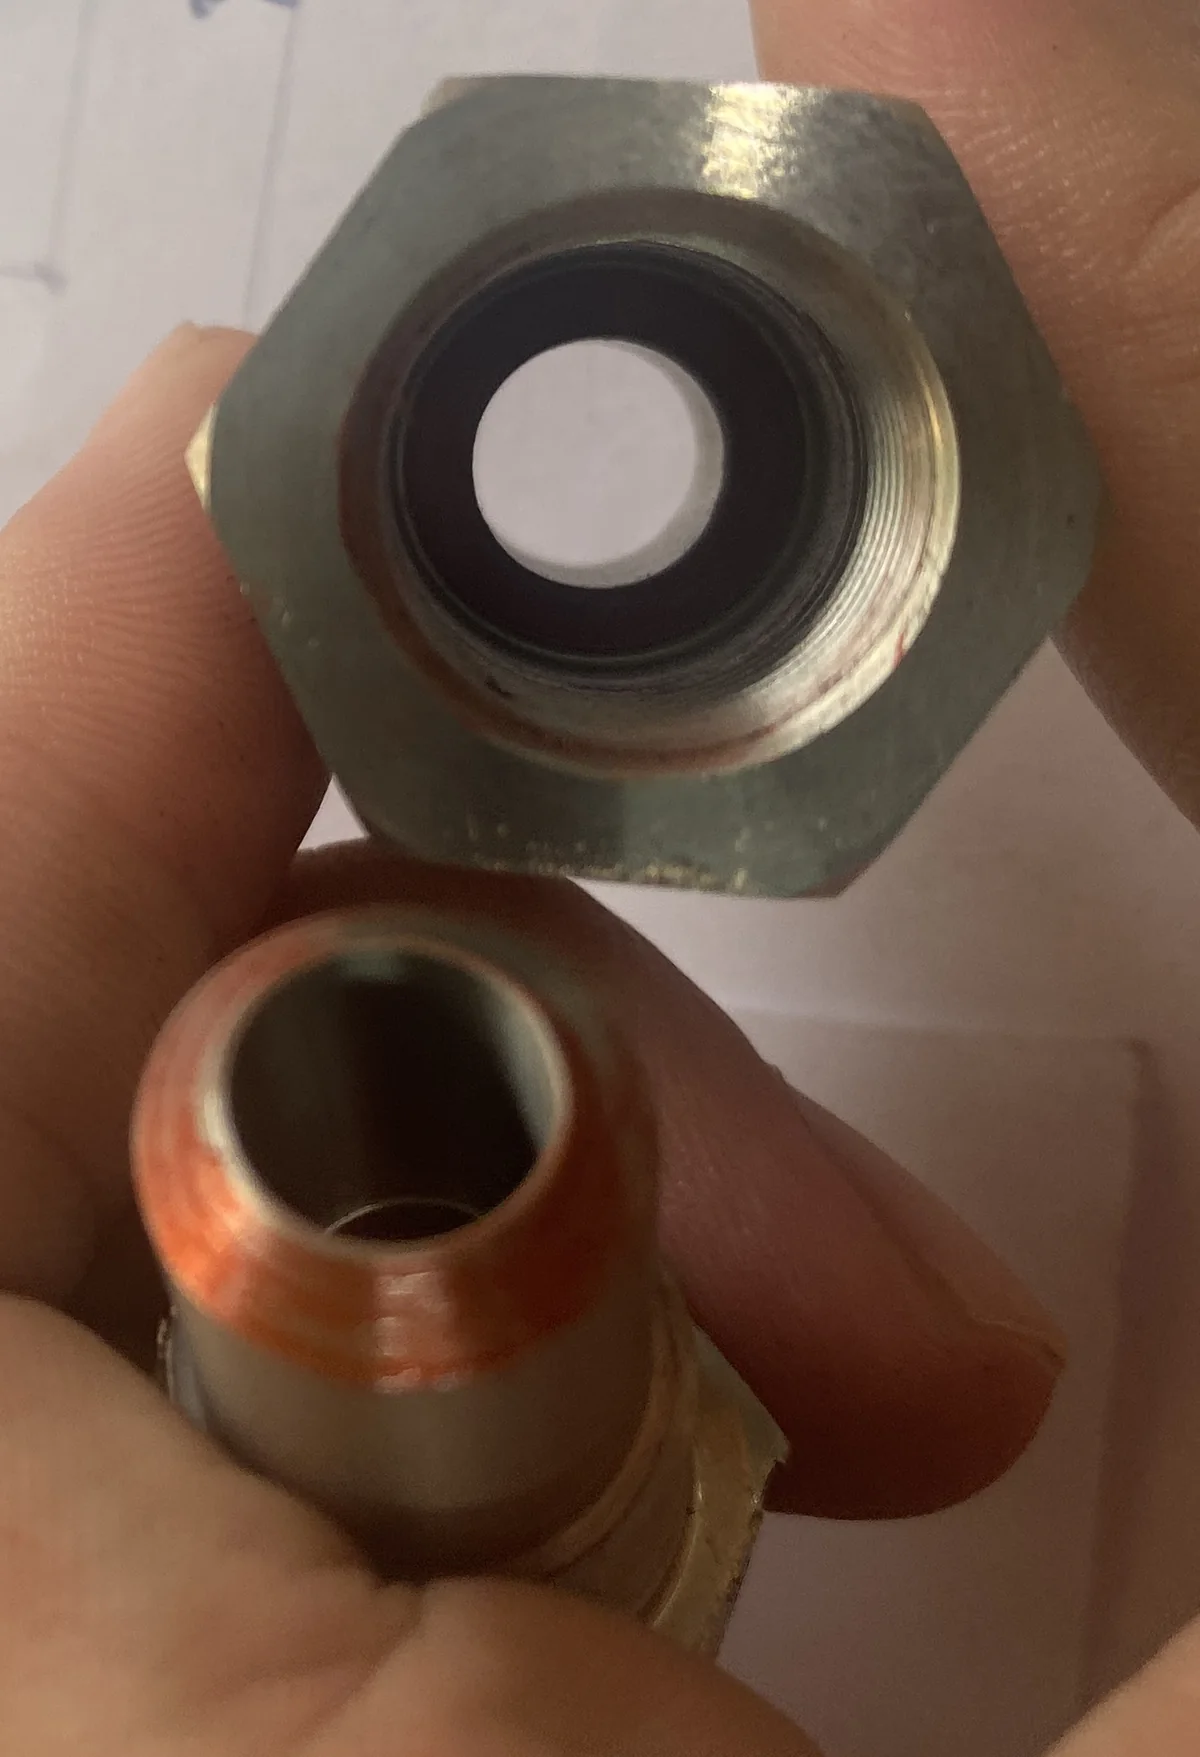
SEAL SEATED IN THE COUNTERBORE · FULL UNBROKEN RING OF TRANSFER AROUND THE MALE LAND
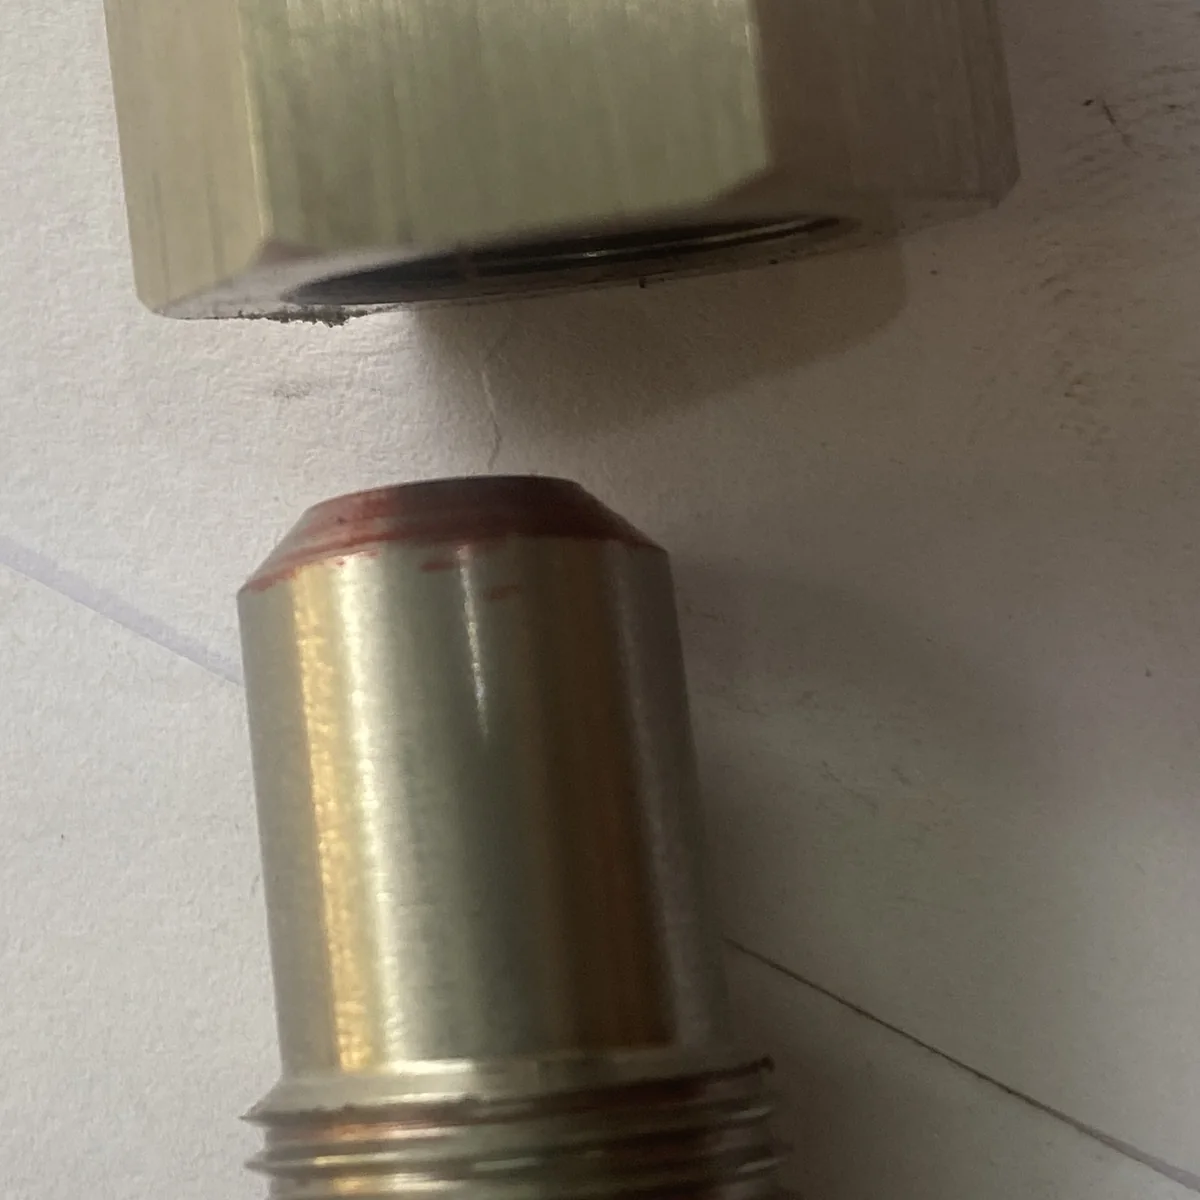
THE LAND AND ITS LEAD-IN CHAMFER · THE CHAMFER LETS THE SEAL ENTER WITHOUT BEING SHAVED
A continuous, unbroken ring of transfer means the land touches all the way round. That is the pass condition, and it is what the middle photograph shows. A broken ring — transfer on three-quarters of the circumference and a clean gap on the rest — means the land is not concentric, not round, or not the right diameter. No amount of extra torque closes that gap; the part goes back on the lathe.
The check costs a few minutes per part and it catches things a dimensional report does not. A land can measure inside tolerance at three points with a micrometer and still not touch all the way round. Where a part is specified as pressure-carrying, a pressure or leak test to the stated working pressure is run on request as well, and the result goes out with the parts.
How the Job Ran
Read the requirement, not just the drawing
The drawing gave geometry. The line that mattered was "the two parts must seal when joined" — which meant identifying which surface would do it, because the drawing did not say.
Sealing land marked on the approval drawing
Land diameter and tolerance, counterbore depth, lead-in chamfer and the finish callout — named and dimensioned, then sent back for approval before any material was cut.
Both halves turned from 316 bar
Land and thread cut in the same setup on each part so they stay concentric — a land that is square to its own thread but eccentric to the mating bore will not seal evenly.
Seal fitted, contact checked
Marking compound on the land, assembled, separated, transfer read. Full ring = pass.
Shipped as an assembly
Seal fitted, so the customer installs the joint rather than sourcing and matching an elastomer to a groove they did not design.
What This Case Generalises To
The specific part is one customer's assembly, but the pattern behind it is common: the moment a joint stops being a catalogue fitting, the sealing decision becomes somebody's job — and by default nobody's. The same reasoning applies to sealed thread adapters between two standards, unions and bulkhead fittings that get opened at every service, sealed caps and plugs, gland nuts and seal carriers.
If you have a joint like this — two parts, one of them yours, and it has to hold pressure — the full capability page is custom sealed metal parts, which lists every sealing form we cut and what to send for a quote. Related: hydraulic adapters · stainless steel connectors · copying a part from a sample. The same 316 family in one piece is the M35×1.5 to M30×2 double-male adapter, and a two-part imperial version is the 9/16-18 UNF connector.
Frequently Asked Questions
Because no fitting standard covers it. A catalogue fitting seals where its standard says — NPT on the thread taper, BSPP under a bonded washer, JIC on a 37 degree cone. When both halves belong to the customer's own assembly, no document says which surface is the sealing surface, so unless somebody names it both halves come out dimensionally correct and the joint still weeps.
Marking compound, used to verify seal contact. It is applied to the sealing land, the two halves are assembled and then separated, and the transfer is read. A continuous unbroken ring of transfer means the land touches all the way round. A broken ring means it does not, and no amount of torque will close it — the part goes back on the lathe.
316 stainless needs no coating, and that matters on a sealed part. Electroplating is specified by minimum thickness class (Fe/Zn 5, 8, 12 or 25 micrometres under ASTM B633 and ISO 4042) and the deposit is never even, so plating a finished sealing land changes its diameter and therefore the seal squeeze. Bare 316 removes that variable.
MOQ is 1 piece with no tooling charge. Proving a sealed joint on a single part before committing to a batch is the normal way to start, and the CAD is kept so a repeat order is cheaper.
MOQ 1 to production volume, no tooling charge. Proving a sealed joint on a single part before committing to a batch is the normal way to start here — and the CAD is kept, so the repeat order is cheaper. Quote in 12 hours; typical production 7–15 days after drawing approval.