Short answer: insert molding is injection moulding with the metal already in the cavity — the insert sits on a locating pin, the tool closes, the melt flows around it, and the part is ejected in one piece with no assembly step. The hold comes from shrinkage: the plastic contracts onto metal that does not contract, roughly 0.4–0.7 % on ABS and 1.8–2.2 % on POM-C, and that squeeze plus the interlock into the knurl gives the highest pull-out and torque-out of any insert method. It is also the wrong method below a few thousand parts a year, because it needs a steel tool and a loading step on every shot. Below that volume, a heat-set or press-in insert into a moulded, cast or machined boss holds the same screw for no tooling cost.
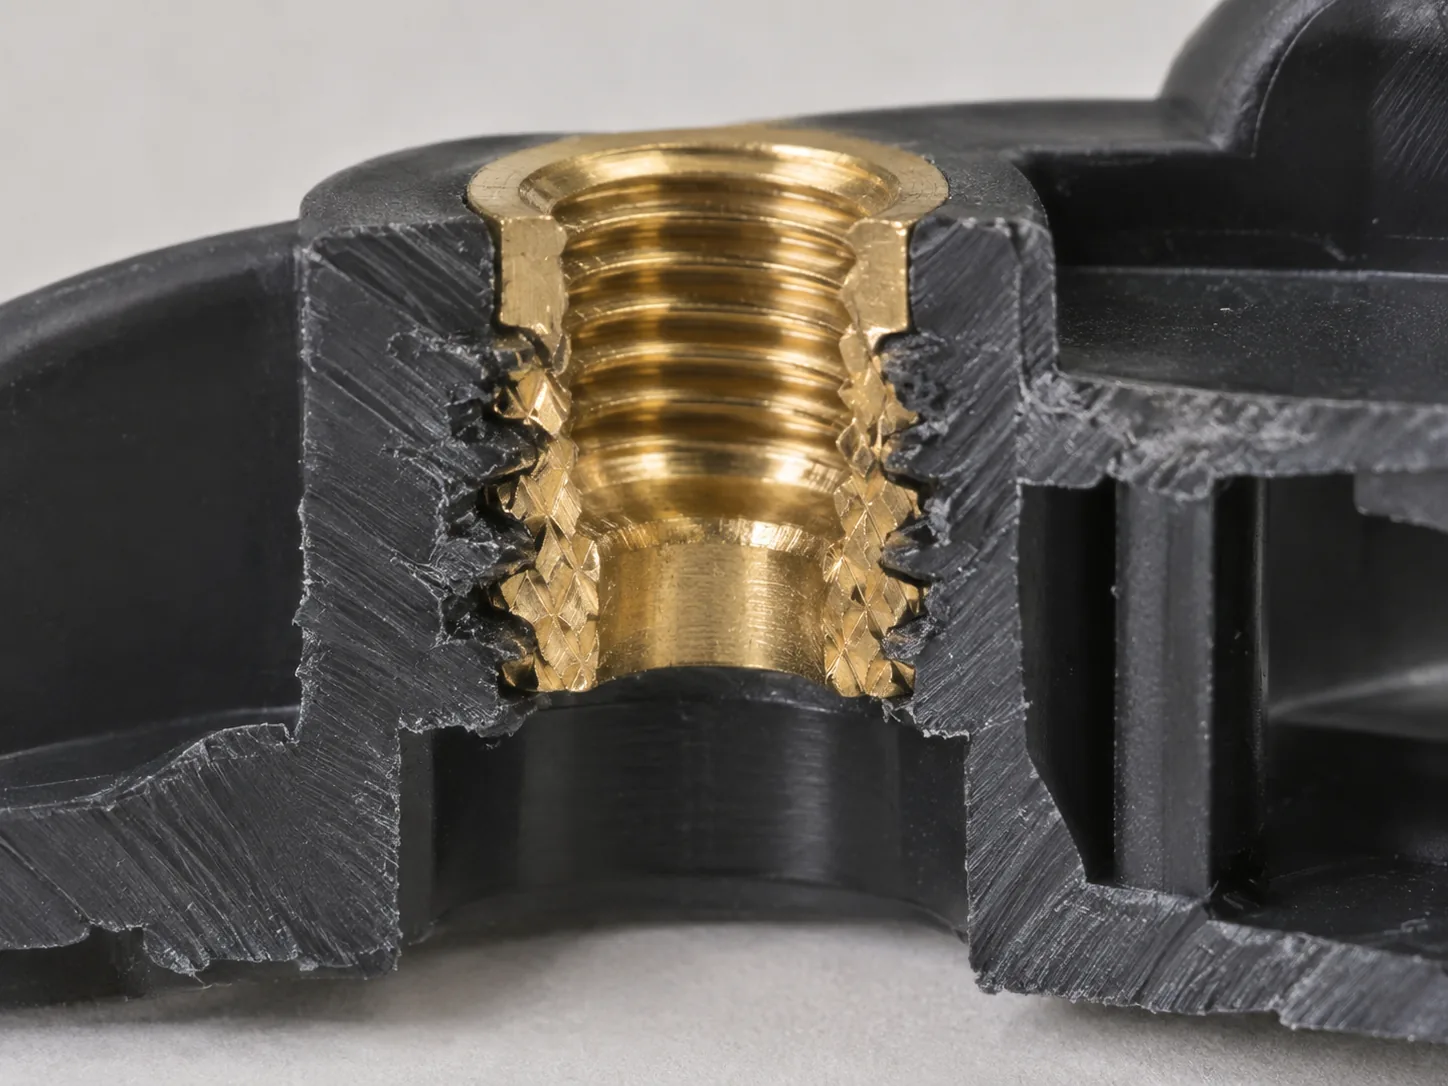
A typical question: a POM housing, a moulder who wants the inserts moulded in, a previous supplier who heat-set them afterwards — which method goes on the drawing, and does an order of 200 pieces change the answer?
It changes the answer. At 200 pieces the tooling decides the project and the holding force never gets tested; at 200,000 the holding force decides the warranty and the tooling is noise. POM is also the material that punishes the wrong call fastest, for a reason that is in its datasheet.
The Five Steps, and What Goes Wrong at Each One
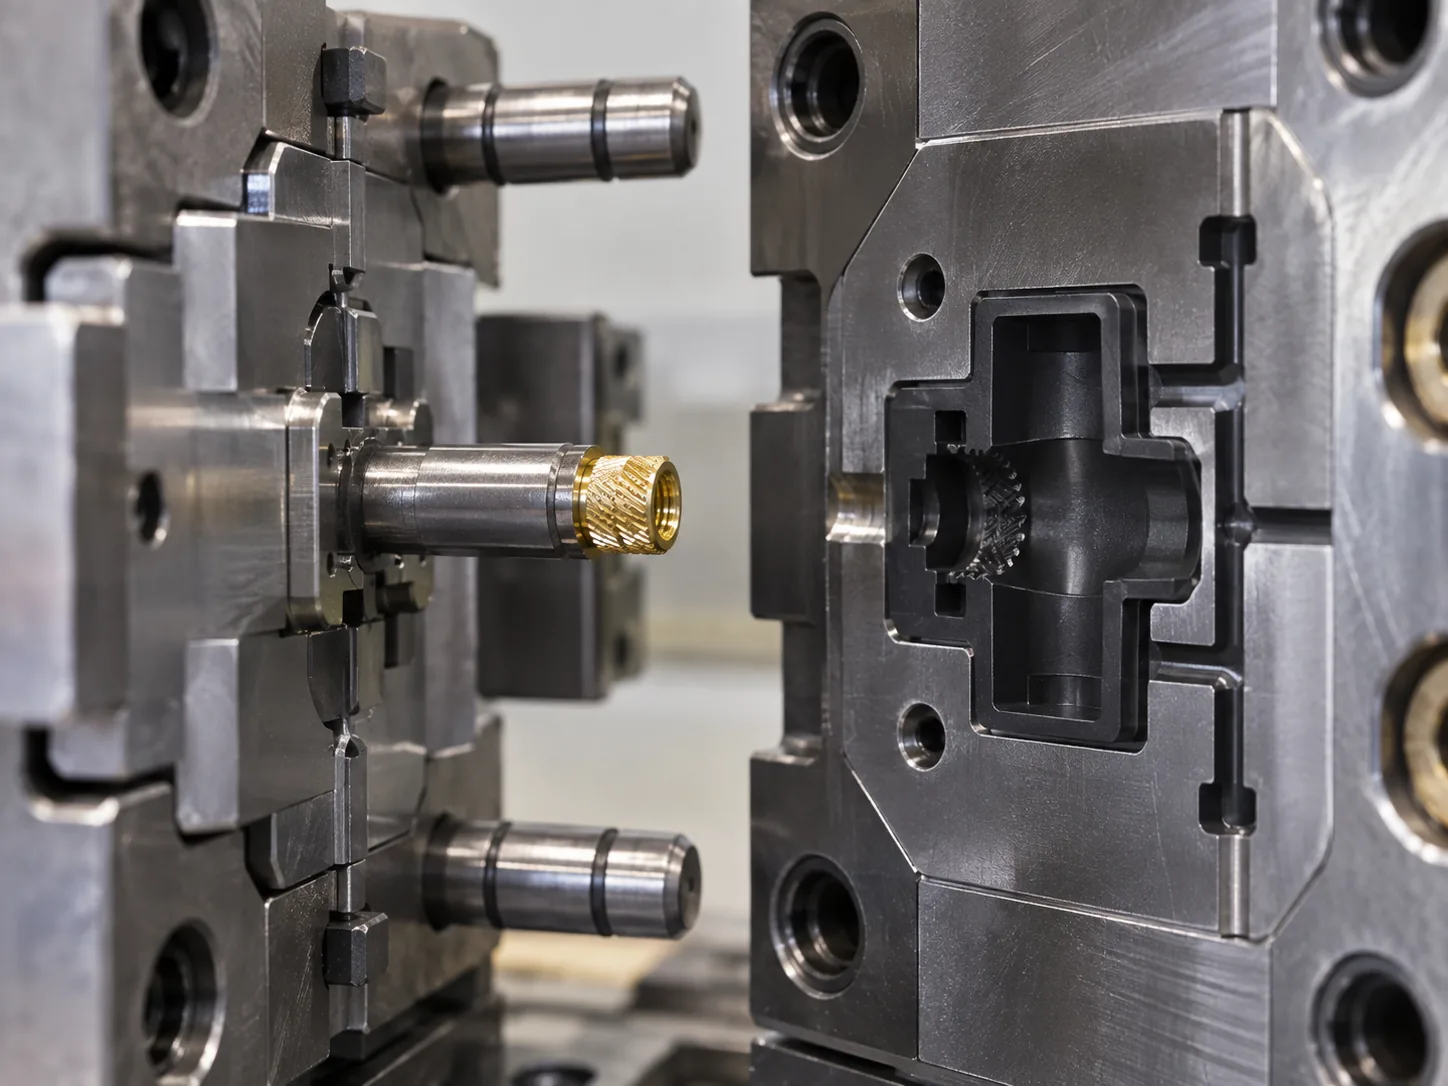
The process reads simple, and every description of it lists the same five steps. Each step also holds a failure, and those decide whether the parts leave the tool saleable or scrap.
| Step | What happens | What goes wrong here | How it shows up on the part |
|---|---|---|---|
| 1. Tool and insert prepared | The cavity gets a locating pin sized to the insert bore; inserts are degreased and, for higher-melt materials, preheated | Cutting oil left on the insert; a worn locating pin | The insert turns under a screwdriver on the first assembly |
| 2. Insert loaded | The insert is placed on the pin by hand, by robot, or on a rotary table that loads one half while the other moulds | Hand loading on a part that needs thousands a year | Cycle time and labour cost per part, not a visible defect |
| 3. Clamp and inject | The tool closes and melt fills the cavity around the insert at injection pressure | The insert is not supported against the flow front; melt pressure pushes or tilts it | The insert sits off-position or out of square; the screw enters at an angle |
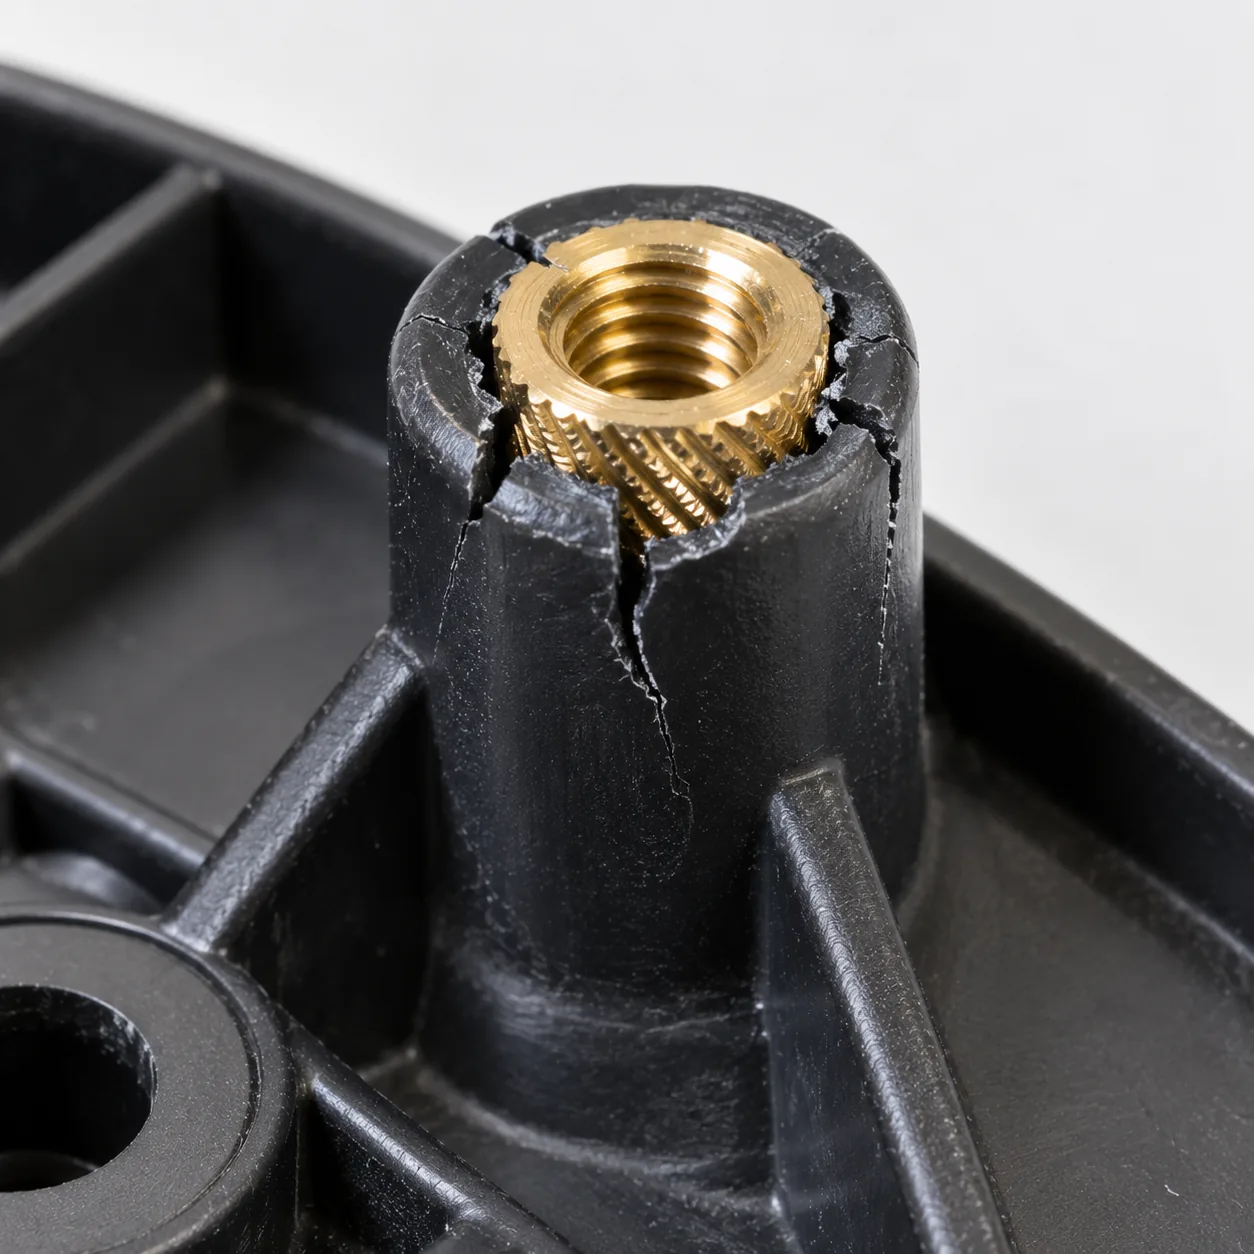
| 4. Hold and cool | Pressure is held while the plastic freezes and shrinks onto the insert | Cold insert in a high-shrink material; sharp knurl ends | A hairline crack in the boss, often only after a week on the shelf |
| 5. Eject | The tool opens and the finished one-piece part is ejected, ready to use | Plastic has crept into the insert thread past the pin | The screw will not start; the thread has to be chased by hand |
Two of those five — loading and cooling — are why the method depends on volume instead of being better across the board. A loading step that cannot be automated adds seconds to every cycle for the life of the programme, and the cooling step is where the material choice either grips the insert or splits the boss.
Shrinkage Is the Grip — and the Crack
A moulded-in insert is not glued and it is not threaded into anything. It is held because the plastic around it gets smaller as it cools and the brass does not. It explains both why the method holds better than any post-assembly route and why it fails on the materials people reach for first.
Mould shrinkage is measured to ISO 294-4 on a standard test bar, and it is published on every material datasheet. The numbers below are the usual ranges for unfilled grades — the exact figure for your grade comes from the supplier's datasheet, and the shrinkage on your actual part also depends on wall thickness, gate position and hold pressure.
| Plastic | Mould shrinkage (ISO 294-4, unfilled) | What that means around an insert |
|---|---|---|
| ABS | 0.4–0.7 % | The gentlest squeeze of the common housing plastics. Forgiving to mould in, and it relies on the knurl and undercut rather than the grip for torque-out. |
| PC (polycarbonate) | 0.5–0.7 % | Low shrink, but the material most likely to crack later. Keep anaerobic threadlocker and cleaning solvents away from a stressed boss. |
| PA6 (nylon) | 0.8–1.5 % | A strong grip out of the tool — then it absorbs moisture in service and swells, which relaxes the squeeze over the first weeks. |
| PA6 + 30 % glass | ≈0.3–0.6 % along flow, higher across it | Glass cuts shrinkage and therefore grip, and the difference between the two directions pulls the boss out of round. |
| POM-C (acetal) | 1.8–2.2 % | The hardest grip of the common materials and the highest hoop stress with it. The classic cracked-boss material. |
| PP-H (polypropylene) | 1.2–2.0 % | Grips well and then creeps: clamp load bleeds off over months, so the screw feels loose without anything having moved. |
| PBT | 1.2–2.0 % (≈0.3–0.9 % at 30 % glass) | The connector-housing default. Holds its dimensions hot, which is why terminals are moulded into it. |
| PEEK | ≈1.0–1.4 % | For inserts that have to stay put above 150 °C, where the cheaper thermoplastics have already relaxed. |
| LSR (liquid silicone) | ≈2–3 % | Overmoulding territory — seals, grips and soft skins over a rigid core, not a threaded boss material. |
Why a grip that was tight in the tool goes loose at 80 °C
The second number nobody checks is thermal expansion. A brass insert expands roughly 19 × 10⁻⁶ per K and a steel one about 11–12; unfilled thermoplastics run 60–150 × 10⁻⁶ per K. Heat the assembly and the plastic grows away from the insert faster than the insert grows — the interference that was holding the insert falls. Cool it below room temperature and the grip rises, along with the hoop stress that cracks the boss. A 30 % glass-filled grade cuts expansion to roughly 20–40 × 10⁻⁶ per K and takes most of that swing out, which is why filled grades are specified for hot, screwed joints. Where the joint carries axial load, a flanged insert moves the load onto the boss face instead of the knurl. The comparable numbers for the machinable grades are in the engineering plastics comparison chart.
Four Ways to Get Metal Into Plastic
The comparison is not insert molding against plain injection molding. Nobody chooses between those: a part either needs metal in it or it does not. The real choice is between the four ways of getting that metal in.
| Method | When the metal goes in | What holds it | Pull-out & torque-out | Tooling | Comfortable quantity |
|---|---|---|---|---|---|
| Moulded-in insert | Before the shot | Shrinkage onto two knurl bands plus the undercut between them | Highest | Steel or aluminium mould, modified for the insert pin | Thousands a year |
| Heat-set / ultrasonic insert | After moulding, into the finished boss | Plastic melted by the tip or horn, re-frozen into the knurl and groove | High — enough for most housing screws | None; a bench tool or a soldering-iron tip | 1 to millions |
| Cold press-in insert | After moulding, pressed into the hole | Interference on a straight knurl | Moderate; lowest of the four under torque | None | 1 to thousands, softer plastics |
| Machined boss + insert, or a metal part instead | After machining the plastic from stock | Heat-set, pressed, bonded, or a tapped metal part | Depends on the insert chosen | None | 1–20 |
Moulded-in wins on holding force and on position accuracy — the insert is located by a pin in the tool, so it lands where the tool says rather than where the assembly fixture says. It loses on everything else: a mould change to add or move an insert, a loading step every cycle, and a part that cannot be reworked if the insert is wrong. Heat-setting wins the opposite way round, which is why it is the default for anything that is not a high-volume programme. Which insert type suits which boss — diamond knurl, straight knurl, flanged, blind, self-tapping — is laid out in the threaded inserts for plastics reference, together with the stock ranges from M1.4 to M20.
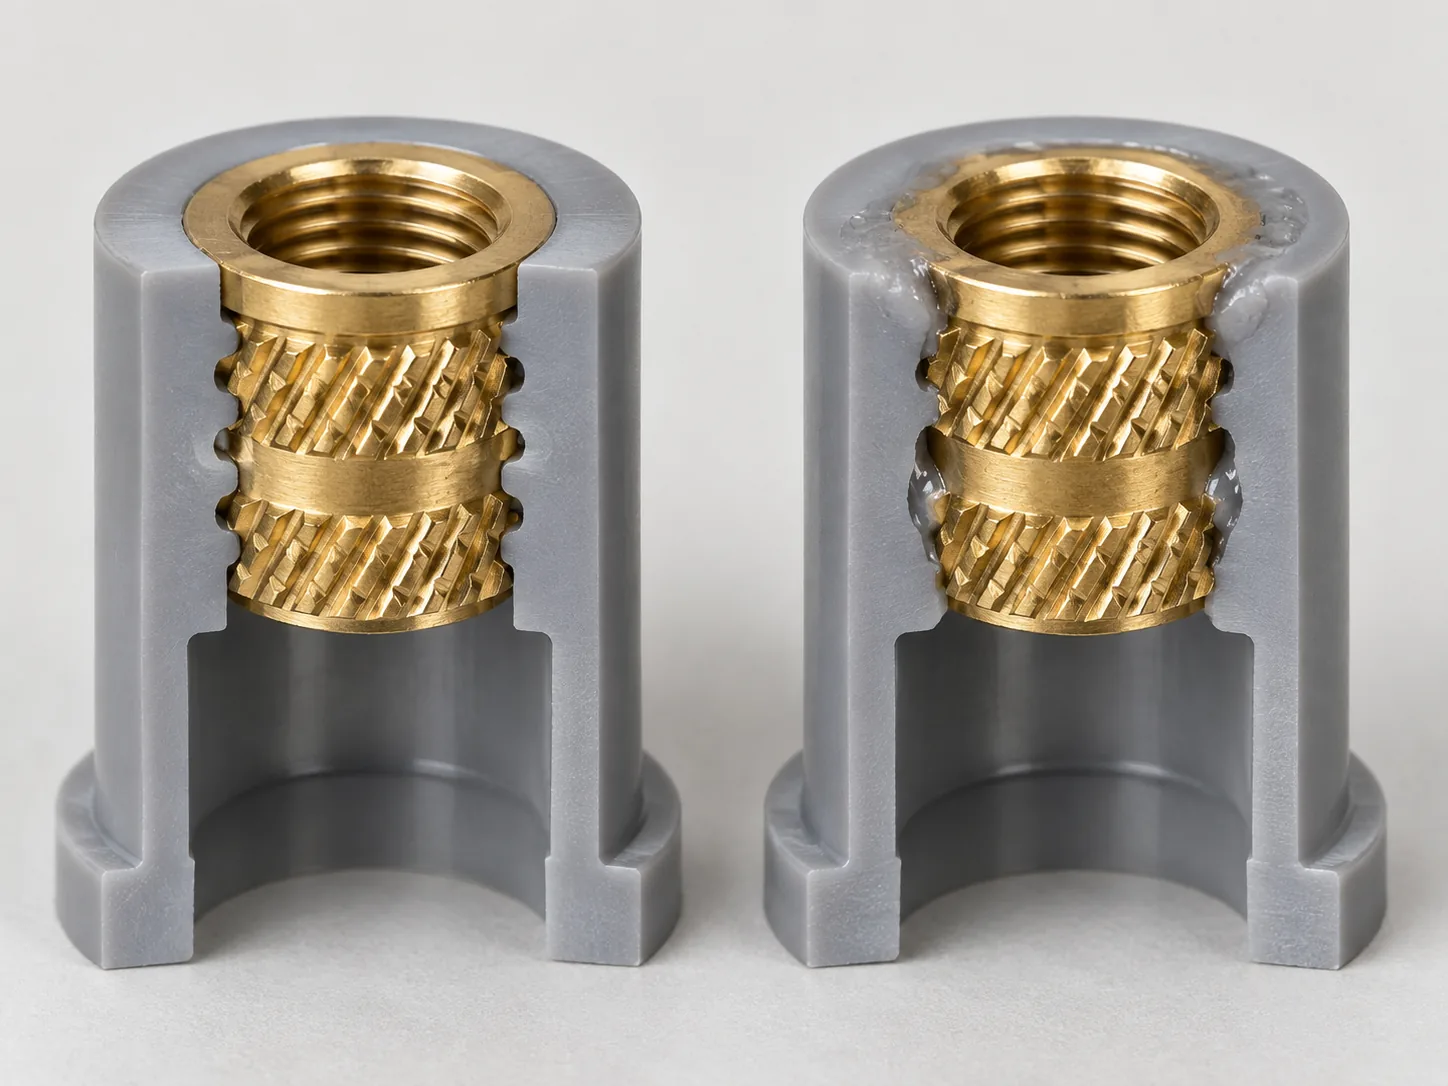
One case has only one answer: a thermoset or a heavily glass-filled part will not heat-set, because heat-setting needs a plastic that remelts. Those parts take a self-tapping insert, a press-in insert with adhesive, or a moulded-in insert — there is no fourth option.
Choose by Quantity — Where Insert Molding Is the Wrong Answer
Tooling is a capital item that has to be earned back across the run, so the way to pick a route is to start from the number of parts, not from the picture of the part. Published industry ranges put hardened steel production tooling at roughly $10,000 to $100,000 and up and aluminium bridge tools at about $1,000 to $10,000, with simple parts landing around $2,000 to $5,000 — those are industry figures, not our quote.
| What you need | Insert molding? | What we would do |
|---|---|---|
| A standard insert in a standard boss, in ABS, PC or nylon | No | Buy the catalogue insert and heat-set it. Nothing turned one-off competes with a stock insert's price, and the datasheet already gives the hole and boss sizes. |
| 1–20 parts with a metal thread in plastic | No | Machine the part from plastic stock, drill the boss, heat-set or press the insert. No tooling, days not weeks. |
| 20–500 parts, moulded appearance needed | No | Vacuum casting in a silicone mould — the insert is cast in place or heat-set after demoulding. About 20–25 parts per mould, first parts in about a week. |
| 100–10,000 parts, one programme | Sometimes | Aluminium bridge tool with hand-loaded inserts. Worth it when the part count is at the top of that band or the geometry will not cast. |
| Thousands a year, ongoing | Yes | Steel tool, insert loading automated where the geometry allows. This is where the lowest piece price lives and where the tool is earned back. |
| An insert into a part that was moulded years ago | No | Heat-set into the existing hole. Where the hole was moulded for an insert that is no longer made, the insert is turned to the hole instead of the part being re-tooled. |
| A part that has to be sealed, or a screw that must not break through | Sometimes | A blind insert answers it either way. Moulded-in if the tool exists; heat-set if it does not. |
If your number sits in the 5–500 band and someone has quoted you a steel mould, get a second opinion before signing. That band is where tooling cost most often swallows a project budget for no reason, and it is the band copying an existing plastic part was built for.
The Boss, and the Six Numbers a Quote Needs
An insert is chosen after the boss is designed, not before — which means the boss usually arrives fixed and the insert has to fit it. The design rule is short: the boss outside diameter should be about twice the insert outside diameter. Less material than that around a knurl and a high-shrink plastic will find the crack.
Those six numbers — thread, insert outside diameter, insert length, boss hole diameter, boss outside diameter, and the depth of material under the insert — are also what a quote needs. When they match a catalogue part, the insert costs cents. When they do not, because the hole was drilled for a discontinued part or the wall is too thin for the stock knurl, the cheaper fix is to change the insert rather than the mould. EKINSUN LTD is a custom parts manufacturer that turns inserts to a drawing — length, outside diameter, knurl and thread — in brass CW614N, 303 or 316L stainless, from one piece.
What the insert itself is made of
Brass CW614N is the default: it machines cleanly, conducts, and does not rust. Stock heat-set inserts are also held in stainless 304 / 1.4301; 316L / 1.4404 goes into chemical and medical housings, and free-machining 303 / 1.4305 is the grade for a turned insert that also needs a flat, a hex or a cross-hole cut into it. Aluminium 6061 is made on request where weight matters, with one caveat: an aluminium thread wears faster than brass under repeated assembly. Where the insert has to be plated for contact resistance or for a corrosive wash-down, tin or nickel goes on after turning.
Anti-rotation has to be designed, not hoped for: a knurl resists torque, but a flat, a hex or a cross-hole on the insert resists it in a way that does not depend on the plastic staying cold. And material under the insert matters as much as material around it: a screw that bottoms on thin plastic under the insert will burst the base of the boss, which is what blind inserts exist to prevent. Where the plastic has to be dimensionally tight around the metal, injection-moulded tolerances follow DIN 16742; features tighter than the mould can hold are machined afterwards, the same way a plastic bearing bore is finished.
Five Ways Insert-Moulded Parts Fail in the Field
These are the five that come back as warranty parts, in rough order of how often they turn up.
| Symptom | Cause | Fix |
|---|---|---|
| Hairline crack around the boss, sometimes days after moulding | Hoop tension from shrinkage, worst in POM-C at 1.8–2.2 %; sharp knurl ends concentrate it; solvent or anaerobic threadlocker on polycarbonate finishes the job | Boss outside diameter about 2 × the insert, radiused knurl ends, no solvent near the boss — or heat-set instead of moulding in |
| Insert spins under a screwdriver | Cutting oil left on the insert, or a single straight knurl with nothing for the plastic to key into | Degrease before loading; double knurl band with an undercut; a flat, hex or cross-hole for anti-rotation |
| Insert off-position or tilted | Melt pressure pushed it — the locating pin is worn, or the insert was not supported against the flow front | Regrind or replace the pin; gate so the flow front does not hit the insert side-on |
| Screw will not start | Plastic flashed past the locating pin into the insert thread | Interference fit on the pin, or a shouldered insert that seals on the pin face |
| Clamp load fades after months or after heat | Thermal expansion mismatch — plastic at 60–150 × 10⁻⁶/K against brass at 19 — plus creep in PP and moisture swelling in nylon | Flanged insert so the load lands on the boss face; a glass-filled grade at 20–40 × 10⁻⁶/K; re-torque specification in the assembly instructions |
Where the Method Earns Its Place
Four part families are where insert molding is the right answer and not a default. Each has a reason that is not "it looks better".
Electronics and connectors
A connector body carries current and has to insulate at the same time, so the metal goes in the tool: stamped terminals and contact pins are moulded into PBT or nylon on a reel, with the carrier strip cut away afterwards. Position accuracy is the reason — a contact that lands out of position will not mate — and position is what a moulded-in insert is best at. Below programme volumes, the same housings are machined and the pins pressed in.
Automotive and machine parts
A bracket or trim piece that bolts to a painted panel needs a metal thread that survives repeated service, and a plastic thread does not. Where the part is current production it is moulded with the insert in place; where it is a discontinued trim or bracket and the tool is long gone, it is machined or cast from the sample and the insert set afterwards — the same thread, none of the tooling.
Medical devices
Handles, valve bodies and instrument housings combine a moulded body with a metal thread or a stainless stem, and the joint has to survive cleaning chemistry and autoclave cycles without a crevice for bioburden. That is a cleanroom job with material traceability behind it: medical injection moulding and cleanroom process control cover what changes when the part is a device rather than a housing.
Hardware, enclosures and fluid parts
Waterproof glands, valve knobs and industrial enclosures take brass inserts so that a fitting can be tightened onto a metal thread rather than into plastic. In this family the choice is open: at project quantities the boss is machined in cast nylon, acetal or polypropylene and the insert set in; at production quantities the same part is moulded with the insert in the tool.
Before You Ask for a Quote
Six lines cover almost every insert job, and five of the six can be read off the part you already have:
- The plastic — grade if you know it, or the part itself. Shrinkage and whether it remelts both follow from this, and both decide the method.
- The real annual quantity — the number that decides between a machined part, a cast part and a tool. A first order of 50 with 5,000 next year is a different answer from 50 and nothing.
- The six insert numbers — thread, insert outside diameter, insert length, boss hole diameter, boss outside diameter, depth under the insert. A photo with a caliper across the boss covers most of it.
- What the screw does — a cover screw, or a joint carrying load. Load means a flanged insert and probably a filled grade.
- Service temperature and what touches it — heat, solvents, cleaning agents, threadlocker. This is the list that decides whether polycarbonate is allowed anywhere near the boss.
- Whether the existing part must be matched — if the hole was moulded for an insert that is no longer made, the insert gets turned to the hole.
Nothing here needs a CAD file — a photo, a hand sketch or the part in the post is enough to start, and ordering with no CAD and low-MOQ parts set out how that runs. Quote within 12 hours, MOQ 1.
Frequently Asked Questions
Insert molding is injection moulding with the metal part already in the cavity. The insert is loaded onto a locating pin, the tool closes, and the melt flows around it, so the part is ejected as one piece with no assembly step. The hold comes from the plastic shrinking onto the insert as it cools plus mechanical interlock into the knurl and undercut.
A moulded-in insert holds best. The plastic fills both knurl bands and the undercut under melt pressure, which gives the highest pull-out and torque-out of any insert method. A heat-set insert is second and is enough for the screws in most housings, and it needs no mould change — which is why it wins on everything except high-volume parts and sealed bosses.
When the tool has thousands of parts a year to carry. Published industry ranges put hardened steel production tooling at roughly $10,000 to $100,000 and up and aluminium bridge tools at about $1,000 to $10,000; insert loading then adds seconds to every cycle. Below roughly 500 parts the tooling is usually the whole budget, and a machined or cast part with a heat-set insert is the cheaper route.
Because the plastic shrinks onto metal that does not shrink, which leaves the boss in permanent hoop tension. High-shrink and notch-sensitive materials are worst: POM-C shrinks 1.8–2.2 % and polycarbonate cracks under stress when it meets anaerobic threadlocker or a cleaning solvent. Fixes are a boss outside diameter about twice the insert, radiused knurl ends, no solvent or threadlocker near the boss, or moving to a heat-set insert.
Not economically on a steel tool, but the same part is achievable two other ways: cast the insert into a silicone mould with vacuum casting, which suits about 5 to 500 pieces and gives roughly 20–25 parts per mould, or machine the part from stock and heat-set or press the insert into the boss, which suits 1 to 20 pieces with no tooling at all.
The plastic grade, the annual quantity, and six numbers for the insert: thread, insert outside diameter, insert length, knurl or anti-rotation feature, boss hole diameter and boss depth under the insert. A photo of the existing part with a caliper on it covers most of that. No CAD file is required and the quote comes back within 12 hours.